Appearance
Payme Connection Guide
Hyperpyron supports payment routing to Payme. Integration involves a set of administrative tasks and very trivial technical setup.
It is recommended to get acquinted with the whole procedure before proceeding.
Step I: Send connection request to Payme.
This can be achived by visiting business-end website:
- Webiste, uzbek: https://business.payme.uz/uz
- Website, english: https://business.payme.uz/en
- Website, russian: https://business.payme.uz/ru
...and entering contact phone number. This will result in Payme Management getting in touch and they will inquire about your capabilities, intents and business registration information.
For business registration you would need at least the following documents:
- Bank Account information
- Guvohnoma
- Passport details of the Acting Director.
In terms of capabilities, Hyperpyron is intended to work with setup known as Custom Integration with Billing.
Custom Integration is rented from AElucrita LLC.
Step II: Technical Group & Service Agreement
If the first phase is completed successfully and agreement to sign Service Agreement is established. then Payme Management will assign Technical Representative and form a Telegram group in which integration will be curated.
The first step of integration is digital signage of the Service Agreement which is performed using Digital Document Exchange.
After that you will have access to Merchant Interface where status of your Service Agreement will indicate mutual acknowledgement and you may proceed to technical setup.

Step III: Point-Of-Sale Registration
In the Merchant Panel(https://merchant.payme.uz/auth/login) select your business and switch to Points-Of-Sale list.
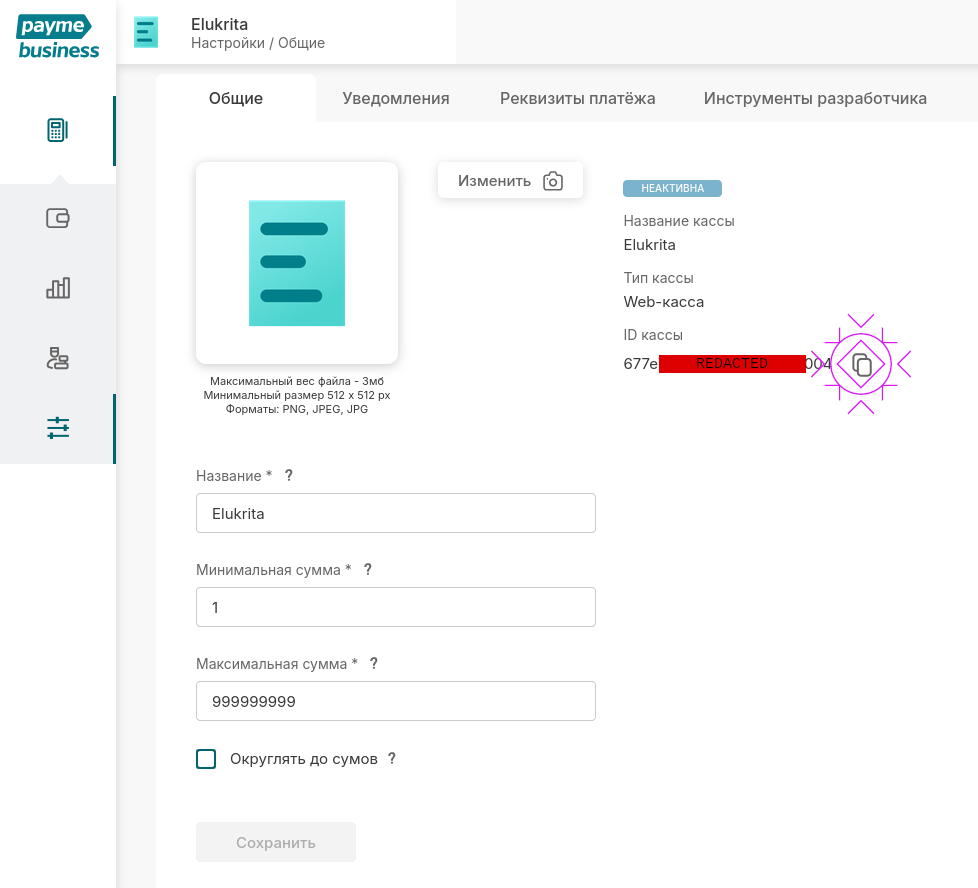
Create new Point-Of-Sale. This step will require filling the following fields:
- POS Description & Name
Fill them according to preference. This is how it will be shown to your customers after they go to Payme from Hyperpyron.
- Account Fields
To be able to find invoice issued by Hyperpyron you need to setup only one field named 'pact'. See table.
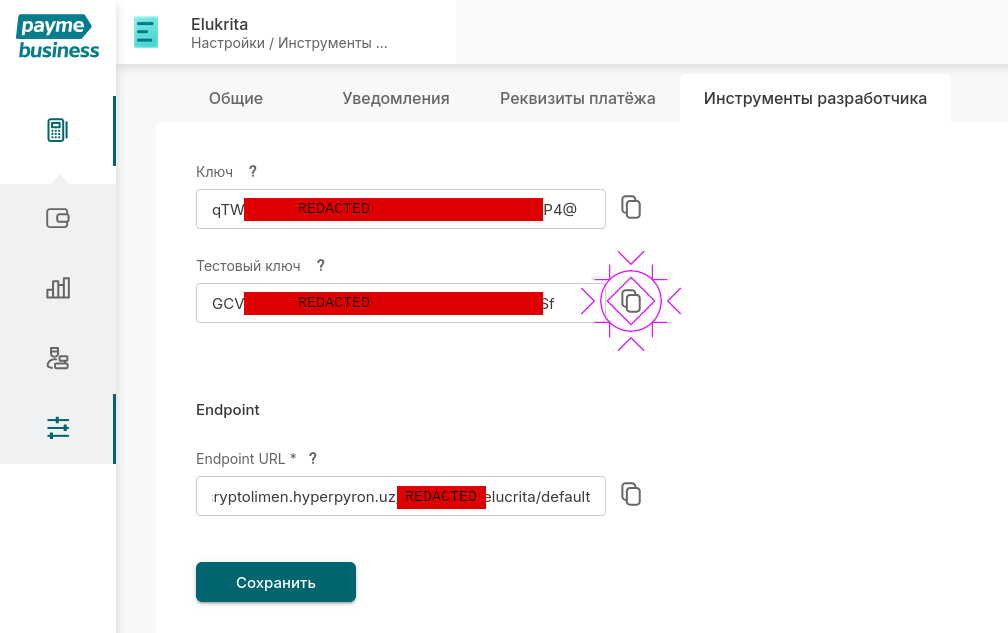
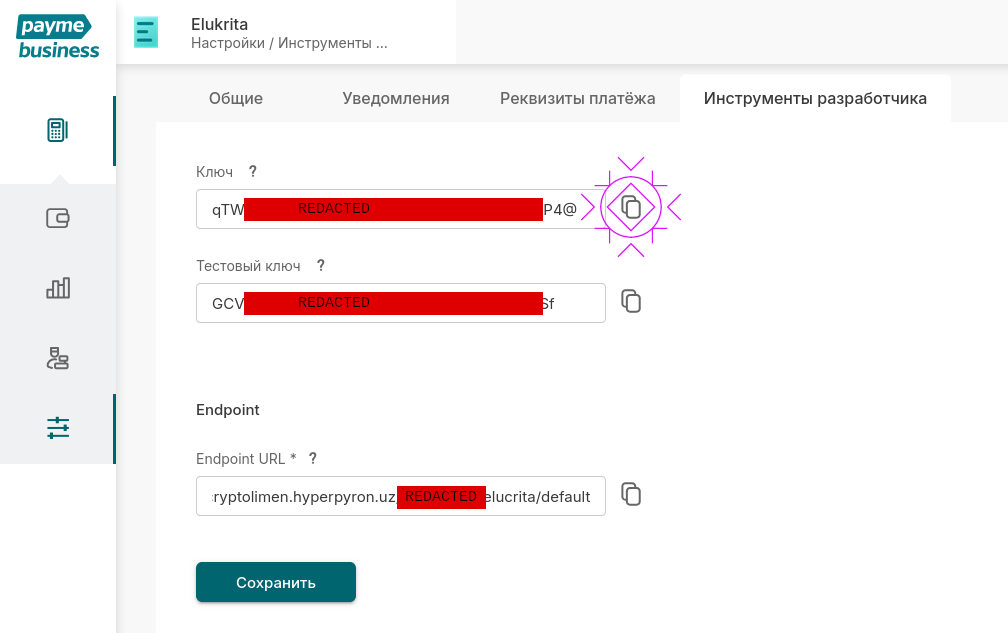
- Endpoint
To update Hyperpyron Payme needs to send requests to the endpoint. It is usually in the form similar to "https://cryptolimen.hyperpyron.uz/v1/payme/dokonname/default". This information will be provided to you by AElucrita(not Payme) sales. Just let us know you would like to enable Payme support.

Step IV: Point-Of-Sale Verification
To be enabled, Payme requires test suite to be executed before it could be considered safe to enable. This procedure is split into two parts. Self-test and Payme Certification test.
Let AElucrita Sales Representative know your
- Testing Payme Point-Of-Sale Key
- Merchant ID(which is called POS ID)
and await for confirmation.
Enter Payme Sandbox (https://test.paycom.uz) and enter Merchant ID which is, actually, a Point-Of-Sale ID, the same you have send to AElucrita before. After that Sandbox will inquire Testing Key for POS, the one you have sent us before as well. This will unlock the Sandbox, which provides ability to evaluate some interactive flows.
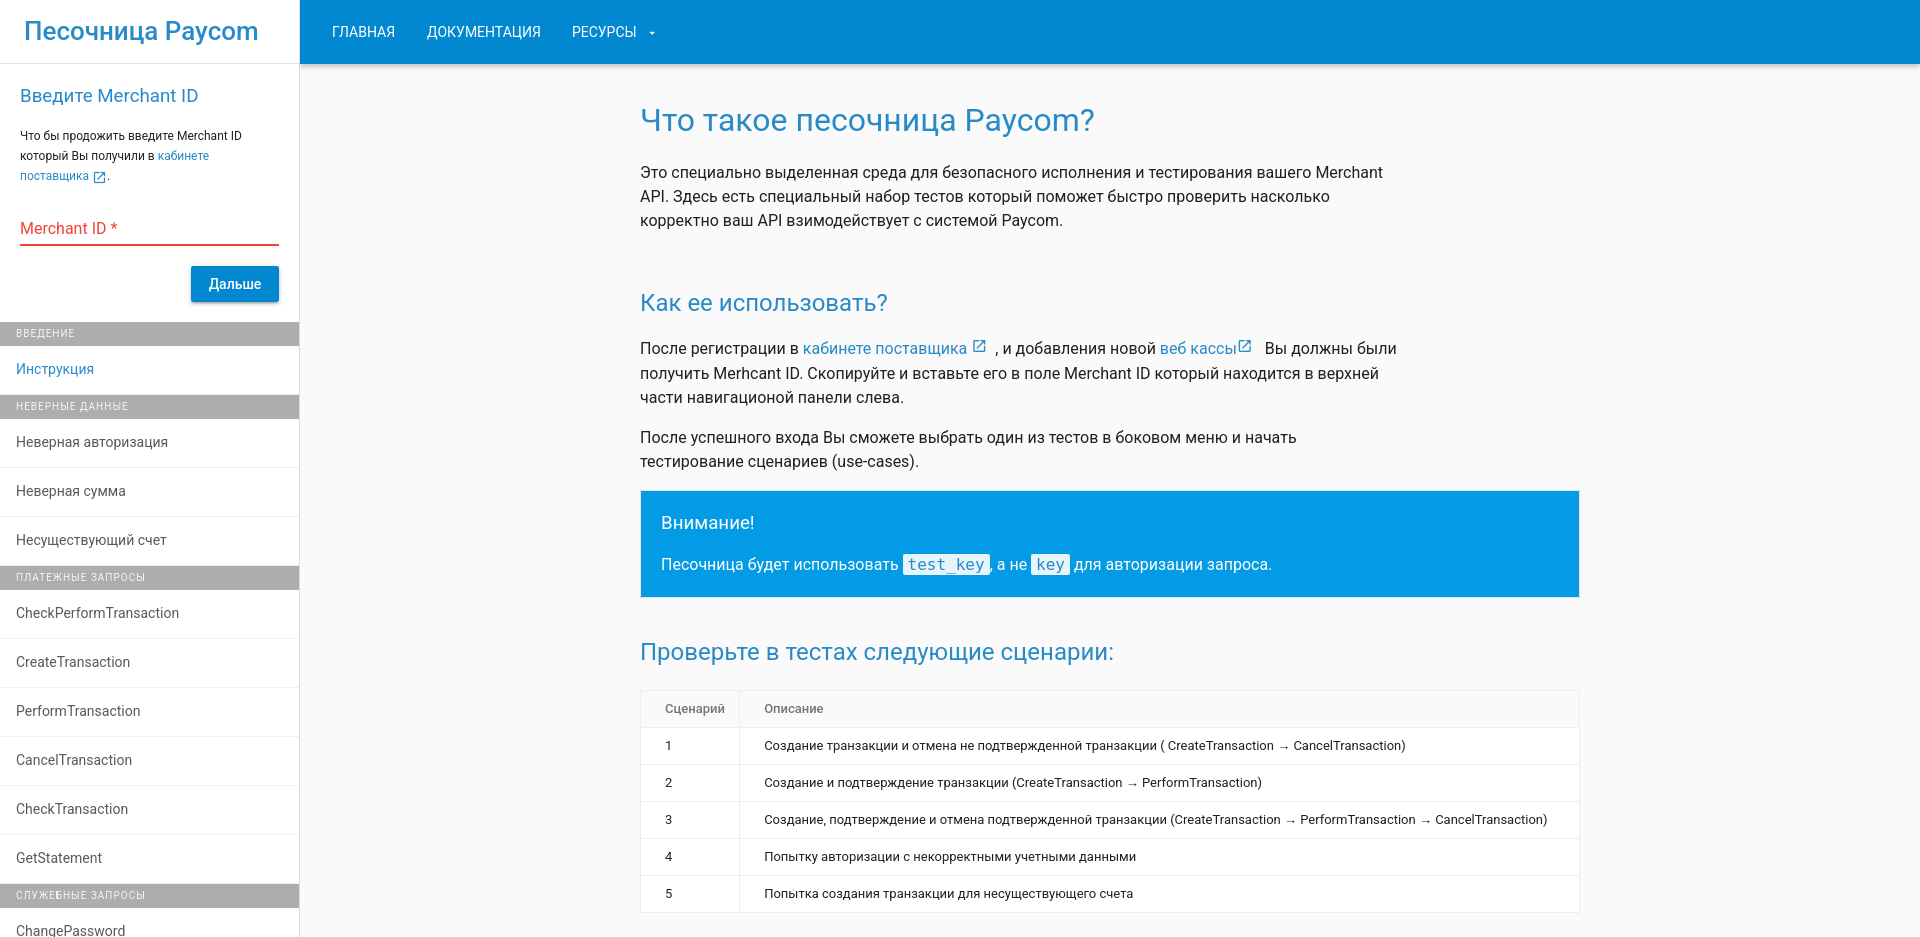
You need to verify that all 5 tests pass with caveat. (CancelTransaction method will error out if Transaction is already completed. Hyperpyron doesn't support Merchant-issued refunds yet. You will have to process those out-of-band.)
Some tests require an active invoice to create Payme transaction against and they would require a 'Hyperpyronic Pact'.
To create such invoice there is following technical procedure:
- Issue a testing invoice via Hyperpyron interface
sh
cat invoice.json | aelucrative-hype-initiator invoice
WARN: Fiscal data is sent verbatim with no prevalidation!
Calling for 1 entries!
{"version":1,"document":"aehype_status_container","payload":{"store":"aelucrita","invoice":"TESTGS1","remote":{"actions":{"gateway":"https://darvoza.hyperpyron.uz/v1/tolov/testingdokon/1221136971-TEST1/"},"identifier":"1221136971-TEST1"}}} #- Go the returned link from the autofeed, which in the example would be:
https://darvoza.hyperpyron.uz/v1/tolov/testingdokon/1221136971-TEST1/
- You should see Payme in the list.
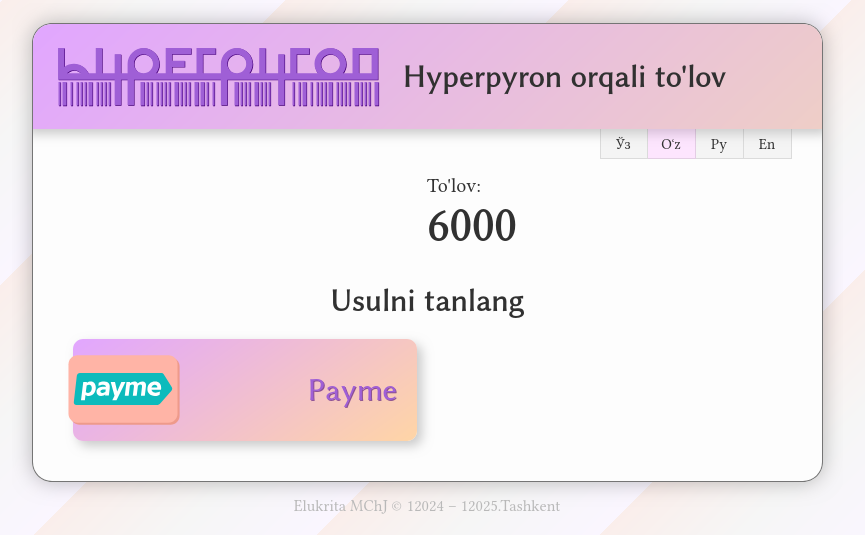
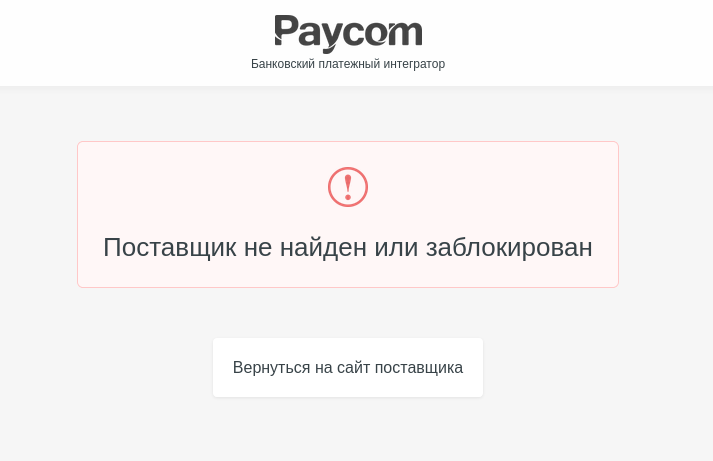
- Clicking on the Payme button will redirect to the Payme error page indicating that "Merchant is not found or is disabled".
(This is normal operation as we yet to perform mandatory testing.)
Record all scenarios and compile them into report. If there are issues, contact AElucrita Representative.
Send the report to Payme Telegram Group.
Step V: Point-Of-Sale Certification
If the provided report is good Payme will request two new invoices to be sent to the Payme Telegram Group.
Create the invoices using previously indicated procedure, but do not use them in the Sandbox.
If everything checks out then your Point-Of-Sale will be switched to live status.
Step VI: Live Mode activation
To enable live mode on the Hyperpyron side provide AElucrita Sales Representative with Production Key.
Beware, this will remove all prior testing data irreversibly except active invoices.
DANGER
Hyperpyronic Invoices will dangle after testing if they were not closed properly from the Sandbox. If you are issuing testing invoices in-band this may have dire consequences. It is recommended to use out-of-band invoice initiation with Initiator Application.
Additional Remarks
- Is it possible to enable testing mode from live mode?
As of now, hot-switching is not possible. Switching to testing mode would require complete deactivation of Point-Of-Sale, but let us know if you need this feature and why.
- I don't have a technical personnel to perform technical tasks. Can AElucrita do this instead?
Yes, we provide this as premium service on case-by-case basis. Unfortunately, in some cases availability of this service is out of our control. Contact AElucrita Sales Representative for additional information.